Configure Okta for SAML Application Integration
Creating a SAML 2.0 application integration in Okta involves configuring Okta as the Identity Provider (IdP) and setting up a SAML connection to enable Single Sign-On (SSO) for your application. Follow these detailed steps:
- Log in to your Okta Admin Console:
Open your web browser and navigate to the Okta Admin Console. (https://your-okta-domain.okta.com)
To log in, enter your Okta admin Username and Password, then click Sign In.
- Navigate to the Applications Dashboard:
- Once logged in, you will land on the Okta Admin Dashboard. From here, navigate to Applications by clicking the Applications tab.
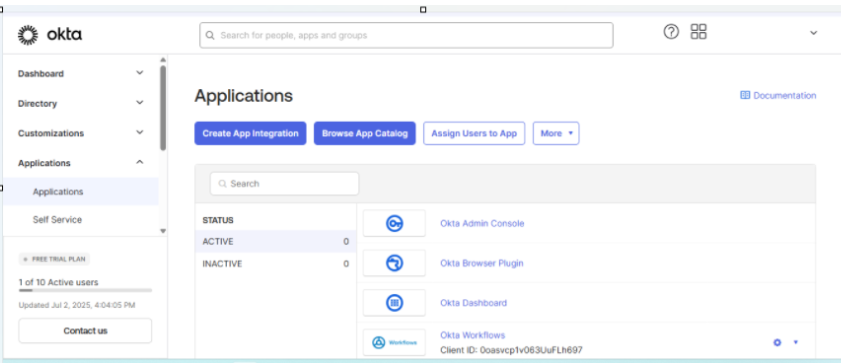
- Click Create App Integration:
- On the Applications Dashboard, click the Create App Integration button to start creating a new application integration.
- Choose the Integration Method:
- In the Create a new app integration window, select SAML 2.0 as the integration method, then click Next.
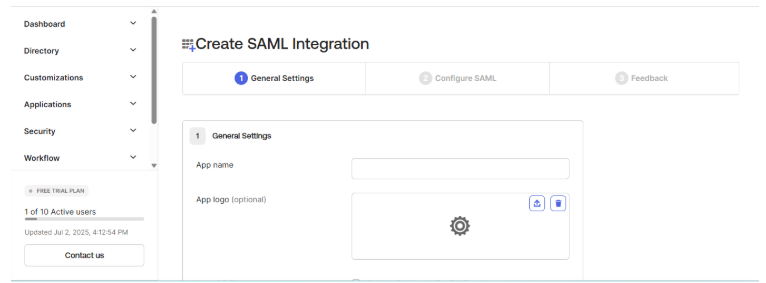
- General Settings:
On the Create SAML Integration wizard, under the General Settings tab, enter the following details:
- App name: Provide a name for your application integration in Okta.
- App logo: Upload a logo or icon for your application.
Click Next.
- Configure SAML Settings:
On the Configure SAML tab, enter the following details:
Single sign-on URL (SSO URL): The location where the SAML assertion is sent with an HTTP POST. This is often referred to as the SAML Assertion Consumer Service (ACS) URL for your application. It typically looks like: https://<Account_URL>/sharedsaml?id=<Account_ID> Account URL and Account ID should be replaced with your SureMDM Account URL and Account ID.
Audience URI (SP Entity ID): This is a unique identifier for your application. It typically looks like: urn:42gears:suremdm:SAML2ServiceProvider
Name ID format: Choose the format for the NameID sent in the SAML assertion. Usually, you can select EmailAddress or Unspecified.
Application username: Select the Okta attribute that will be used as the username for your application. This could be the user's email or another unique identifier.
Optionally, you can configure attribute statements to include additional user attributes in the SAML assertion. This step depends on your application's requirements.
Attribute Statements:
Attribute statements are used to send user-specific attributes to the service provider during SAML authentication.
| Name | Name Format | Value |
|---|---|---|
| Unspecified | user.email | |
| First | Unspecified | user.firstName |
Group attribute statements allow filtering and sending group information based on specific criteria.
Group Attribute Statements:
| Name | Name format (optional) | Filter |
|---|---|---|
| UserGrp | Unspecified | Starts with: Test |
| userDir | Unspecified | Contains: Comp |
Only groups whose names start with "Test" will be included in the SAML assertion.
Any group name containing "Comp" will be included in the SAML assertion.
These attribute settings help control which user and group information is passed to the service provider for authentication and authorization.
- Review the SAML settings to ensure that all the required values are correct and up-to-date. Make any necessary adjustments if needed.
- Click Next.
- In the Feedback tab, click Finish.
- We now need to assign the created application to the Users:
Users must be created if they don't already exist.
To assign the User to an Application, follow these steps:
Go to Applications in the left sidebar.
Select the application you want to assign the user to.
Click the Assignments tab.
Click Assign > Assign to People.
Search for a user and click Assign.
(Optional) Configure user-specific settings.
Click Save and Go Back, then Done.
Verify User Assignment:
Go back to Directory → People.
Click on the user’s name.
Under the Applications section, ensure the assigned application appears.
- Test the Integration:
- Test the SAML integration by logging in to Okta as a user who has access to the application.
- You should be redirected to your application and logged in automatically using SAML SSO.
- Deploy the Integration
- Once testing is successful, deploy the SAML integration in your production environment.
- Communicate the availability of the application to your users and provide any necessary instructions for accessing it.
By following the steps above, you can successfully create a SAML 2.0 application integration in Okta. Once the application is created, open it and click the Sign On tab.
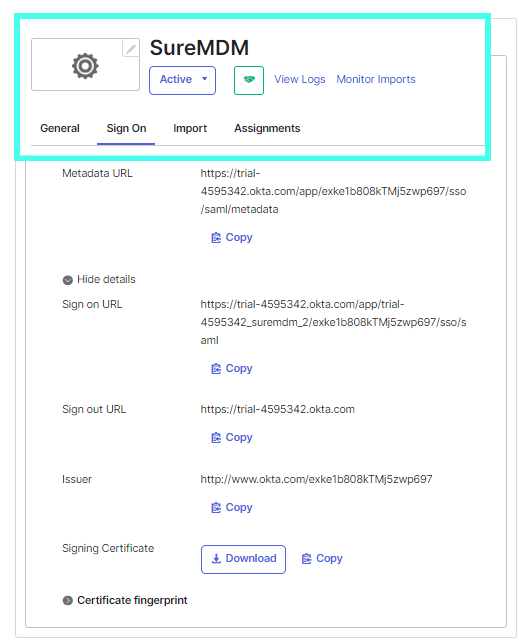
- From the Sign On tab, copy the Issuer, Sign-on URL and Sign Out URL and download the Signing Certificate. This information will be used in the next section when configuring the Shared Device Mode.